|
|
| (10 revisões intermediárias pelo mesmo usuário não estão sendo mostradas) |
| Linha 2: |
Linha 2: |
| {| style="width:100%; padding: 10px;" | | {| style="width:100%; padding: 10px;" |
| | style="; white; padding: 40px;" | | | | style="; white; padding: 40px;" | |
| | | <center> |
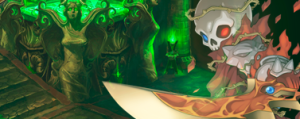
| [[Arquivo:Guia de Iniciante2.png||]] | | [[Arquivo:Guia Inicial.jpg|link=]] |
| | | </center> |
| {| | | {| |
| ![[Arquivo:Menu passos2.png|link=Guia_iniciante#Primeiros_Passos|400px]] | | ![[Arquivo:Menu passos2.png|link=Guia_iniciante#Primeiros_Passos|400px]] |
| Linha 21: |
Linha 21: |
|
| |
|
| </center> | | </center> |
| | ==Rates== |
| | <center>[[Arquivo:Rates finalizado.png]]</center> |
| =<span style="#FFFFFF;font-family: K Gothic Bold; font-size: 40pt">'''Primeiros Passos'''</span>= | | =<span style="#FFFFFF;font-family: K Gothic Bold; font-size: 40pt">'''Primeiros Passos'''</span>= |
| Bem vindo ao Raven RO ,Vamos Iniciar sua aula? . <br> | | Bem vindo ao Raven RO ,Vamos Iniciar sua aula? . <br> |
|
| |
|
| {| class="wikitablew-tr" style="display:inline-table; margin-right: 1em; width:29%" | | {| class="wikitablew-tr" style="display:inline-table; margin-right: 1em; width:29%" |
| | [[Arquivo:aprendiz11.png]] | | | [[Arquivo:aprendiz11.png|600px|]] |
| |Fale com o Professor para receber seus primeiros ensinamentos e lhe encaminhar ao Sr.Fabre. <br> | | |Fale com o Professor para receber seus primeiros ensinamentos e lhe encaminhar ao Sr.Fabre. <br> |
| |} | | |} |
| Linha 140: |
Linha 142: |
| |} | | |} |
| <br> | | <br> |
|
| |
| ==<span style="#FFFFFF;font-family: K Gothic Bold; font-size: 40pt">'''Onde Upar ?'''</span>==
| |
|
| |
| {|
| |
| |
| |
| '''Divisão de XP:''' A diferença de divisão de experiência é de 15 níveis.
| |
| '''Equipamentos/Itens de XP:''' Use e abuse de equipamentos e consumíveis que te fornecerão um maior ganho de experiência.
| |
| '''Spawn dos Monstros:''' Os seguintes comandos podem te ajudar na hora de procurar o monstro ideal pra você caçar.
| |
| CTRL + ` : Mostra um mapa de todos os campos no jogo. Clique em um mapa para buscar os NPCs ou monstros dentro dele.
| |
| @whereis (Nome do Monstro ou ID): Mostra uma lista de mapas onde um determinado monstro aparece, e a sua quantidade.
| |
| @mi (Nome do Monstro ou ID): Mostra informações detalhadas de um determinado monstro.
| |
| @whodrops (Nome do Item ou ID): Mostra uma lista de monstros que derrubam um determinado item, e a chance.
| |
| '''Navegação''': O que está sendo dito nesse guia é apenas uma SUGESTÃO, e vocês podem procurar mapas e mobs por conta própria. Para isso use e abuse do Sistema de Navegação.
| |
| Na barra de pesquisa utilize <code>$$lv<'''X'''>~<'''Y'''></code>, onde o '''X''' deve ser trocado pelo nível inicial e o '''Y''' pelo nível final, dessa forma o sistema irá procurar todos monstros entre nível X e Y escolhido, como no exemplo <code>$$lv'''50'''~'''60'''</code>
| |
| Depois de escolher o mapa/monstro, basta clicar em <code>TELEPORTAR</code> que você será teleportado para o mapa escolhido
| |
| |}
| |
|
| |
| {| class="wikitablew-tr mw-collapsible mw-collapsed" style="width:80%" ;
| |
| ! colspan="7" style=";" |Nv. 1 à 50
| |
| |-
| |
| ! style="; text-align: center; width:10%" |Nível
| |
| ! style="; text-align: center; width:10%" |Onde Upar
| |
| ! colspan="5" style="; text-align: center;" |Mobs
| |
| |-
| |
| ! rowspan="2" |1 ~ 50
| |
| ! Campo de Aprendiz
| |
| | style="vertical-align:bottom; text-align:center" |{{Monster List|id=1002|monstro=<br>Poring}}
| |
| | style="vertical-align:bottom; text-align:center" | {{Monster List|id=1063|monstro=<br>Lunático}}
| |
| | colspan="3" |
| |
| |-
| |
| !Formigueiro Infernal
| |
| | style="vertical-align:bottom; text-align:center" |{{Monster List|id=1097|monstro=<br>Ovo de Andre}}
| |
| | style="vertical-align:bottom; text-align:center" |{{Monster List|id=1105|monstro=<br>Deniro}}
| |
| | style="vertical-align:bottom; text-align:center" |{{Monster List|id=1160|monstro=<br>Piere}}
| |
| | style="vertical-align:bottom; text-align:center" |{{Monster List|id=1095|monstro=<br>Andre}}
| |
| | style="vertical-align:bottom; text-align:center" | {{Monster List|id=1176|monstro=<br>Vitata}}
| |
| |}
| |
| {| class="wikitablew-tr mw-collapsible mw-collapsed" style="width:80%" ;
| |
| ! colspan="5" style=";" |Nv. 50 à 70
| |
| |-
| |
| ! style="; text-align: center; width:10%" |Nível
| |
| ! style="; text-align: center; width:10%" |Onde Upar
| |
| ! colspan="3" style="; text-align: center;" |Mobs
| |
| |-
| |
| ! rowspan="2" |50 ~ 70
| |
| !Caverna dos Orcs 2
| |
| | style="vertical-align:bottom; text-align:center" |{{Monster List|id=1152|monstro=<br>Orc Esqueleto}}
| |
| | style="vertical-align:bottom; text-align:center" |{{Monster List|id=1177|monstro=<br>Zenorc}}
| |
| | style="vertical-align:bottom; text-align:center" |{{Monster List|id=1153|monstro=<br>Orc Zumbi}}
| |
| |-
| |
| !Deserto de Sograt 16
| |
| | style="vertical-align:bottom; text-align:center" |{{Monster List|id=1119|monstro=<br>Frilldora}}
| |
| | style="vertical-align:bottom; text-align:center" |{{Monster List|id=1165|monstro=<br>Arenoso}}
| |
| | style="vertical-align:bottom; text-align:center" |{{Monster List|id=1127|monstro=<br>Hode}}
| |
| |}
| |
| {| class="wikitablew-tr mw-collapsible mw-collapsed" style="width:80%" ;
| |
| ! colspan="4" style=";" |Nv. 70 à 106
| |
| |-
| |
| ! style="; text-align: center; width:10%" |Nível
| |
| ! style="; text-align: center; width:10%" |Onde Upar
| |
| ! colspan="2" style="; text-align: center;" |Mobs
| |
| |-
| |
| ! rowspan="2" |70 ~ 106
| |
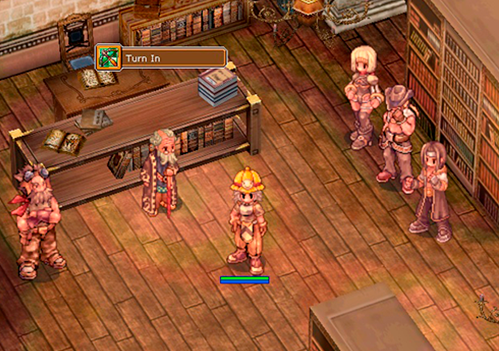
| !Turn-In (bRO)
| |
| | style="vertical-align:bottom; text-align:center" |{{Monster List|id=1405|monstro=<br>Tengu}}
| |
| | style="vertical-align:bottom; text-align:center" |{{Monster List|id=1692|monstro=<br>Breeze}}
| |
| |-
| |
| !Turn-In (iRO)
| |
| | style="vertical-align:bottom; text-align:center" |{{Monster List|id=1386|monstro=<br>Rochoso}}
| |
| | style="vertical-align:bottom; text-align:center" |{{Monster List|id=1201|monstro=<br>Rybio}}
| |
| |}
| |
| {| class="wikitablew-tr mw-collapsible mw-collapsed" style="width:80%" ;
| |
| ! colspan="4" style=";" |Nv. 106 à 130
| |
| |-
| |
| ! style="; text-align: center; width:10%" |Nível
| |
| ! style="; text-align: center; width:10%" |Onde Upar
| |
| ! colspan="2" style="; text-align: center;" |Mobs
| |
| |-
| |
| ! rowspan="2" |106 ~ 130
| |
| !Turn-In (bRO)
| |
| | style="vertical-align:bottom; text-align:center" |{{Monster List|id=1291|monstro=<br>Aparição}}
| |
| | style="vertical-align:bottom; text-align:center" |{{Monster List|id=1098|monstro=<br>Anubis}}
| |
| |-
| |
| !Turn-In (iRO)
| |
| | style="vertical-align:bottom; text-align:center" |{{Monster List|id=1735|monstro=<br>Alicel}}
| |
| | style="vertical-align:bottom; text-align:center" |{{Monster List|id=1772|monstro=<br>Isilla}}
| |
| |}
| |
| {| class="wikitablew-tr mw-collapsible mw-collapsed" style="width:80%" ;
| |
| ! colspan="8" style=";" |Nv. 130 à 160
| |
| |-
| |
| ! style="; text-align: center; width:10%" |Nível
| |
| ! style="; text-align: center; width:10%" |Onde Upar
| |
| ! colspan="6" style="; text-align: center;" |Mobs
| |
| |-
| |
| ! rowspan="2" |130 ~ 160
| |
| !Large Bath
| |
| | style="vertical-align:bottom; text-align:center" |{{Monster List|id=20644|monstro=<br>Boiled Water Marc}}
| |
| | style="vertical-align:bottom; text-align:center" |{{Monster List|id=20645|monstro=<br>Boiled Water Swordfish}}
| |
| | style="vertical-align:bottom; text-align:center" |{{Monster List|id=20646|monstro=<br>Boiled Water Piranha}}
| |
| | style="vertical-align:bottom; text-align:center" |{{Monster List|id=20643|monstro=<br>Boiled Water Phen}}
| |
| | style="vertical-align:bottom; text-align:center" |{{Monster List|id=20633|monstro=<br>Broken Cleaner}}
| |
| | style="vertical-align:bottom; text-align:center" |{{Monster List|id=20634|monstro=<br>Broken Cleaner}}
| |
| |-
| |
| !Illusion of Underwater 01
| |
|
| |
| (Quests e Mobs)
| |
| | style="vertical-align:bottom; text-align:center" |{{Monster List|id=20801|monstro=<br>Deep Sea Sropho}}
| |
| | style="vertical-align:bottom; text-align:center" |{{Monster List|id=20805|monstro=<br>Deep Sea Merman}}
| |
| | style="vertical-align:bottom; text-align:center" |{{Monster List|id=20802|monstro=<br>Deep Sea Obeaune}}
| |
| | style="vertical-align:bottom; text-align:center" |{{Monster List|id=20804|monstro=<br>Deep Sea Marse}}
| |
| | style="vertical-align:bottom; text-align:center" |{{Monster List|id=20803|monstro=<br>Deep Sea Deviace}}
| |
| |
| |
| |}
| |
| {| class="wikitablew-tr mw-collapsible mw-collapsed" style="width:80%" ;
| |
| ! colspan="10" style=";" |Nv. 160 à 180
| |
| |-
| |
| ! style="; text-align: center; width:10%" |Nível
| |
| ! style="; text-align: center; width:10%" |Onde Upar
| |
| ! colspan="8" style="; text-align: center;" |Mobs
| |
| |-
| |
| ! rowspan="3" |160 ~ 180
| |
| !Illusion of Labyrinth
| |
|
| |
| | style="vertical-align:bottom; text-align:center" |{{Monster List|id=20532|monstro=<br>Chaotic Stem Worm}}
| |
| | style="vertical-align:bottom; text-align:center" |{{Monster List|id=20529|monstro=<br>Chaos Ghostring}}
| |
| | style="vertical-align:bottom; text-align:center" |{{Monster List|id=20531|monstro=<br>Chaos}}
| |
| | style="vertical-align:bottom; text-align:center" |{{Monster List|id=20528|monstro=<br>Chaos Mantis}}
| |
| | style="vertical-align:bottom; text-align:center" |{{Monster List|id=20527|monstro=<br>Chaos Hunter Fly}}
| |
| | style="vertical-align:bottom; text-align:center" |{{Monster List|id=20526|monstro=<br>Chaos Side Winder}}
| |
| | style="vertical-align:bottom; text-align:center" |{{Monster List|id=20525|monstro=<br>Chaos Baphomet Jr.}}
| |
| | style="vertical-align:bottom; text-align:center" |{{Monster List|id=20530|monstro=<br>Chaos Killer Mantis}}
| |
| |-
| |
| !Rachel Oz Gorge
| |
| | style="vertical-align:bottom; text-align:center" |{{Monster List|id=21324|monstro=<br>Grey Goat}}
| |
| |{{Monster List |id=21323 |monstro=<br>Rake Hand}}
| |
| |{{Monster List |id=21296 |monstro=<br>Rake Hand}}
| |
| | colspan="5" |
| |
| |-
| |
| !Illusion of Underwater 02
| |
|
| |
| (Quests e Mobs)
| |
| | style="vertical-align:bottom; text-align:center" |{{Monster List|id=20806|monstro=<br>Deep Sea Sedora}}
| |
| | style="vertical-align:bottom; text-align:center" |{{Monster List|id=20807|monstro=<br>Deep Sea Swordfish}}
| |
| | style="vertical-align:bottom; text-align:center" |{{Monster List|id=20808|monstro=<br>Deep Sea Strouf}}
| |
| | style="vertical-align:bottom; text-align:center" |{{Monster List|id=20809|monstro=<br>Deep Sea Phen}}
| |
| | style="vertical-align:bottom; text-align:center" |{{Monster List|id=20810|monstro=<br> Deep Sea King Dramoh}}
| |
| | colspan="3" |
| |
| |}
| |
| {| class="wikitablew-tr mw-collapsible mw-collapsed" style="width:80%" ;
| |
| ! colspan="8" style=";" |Nv. 180 à 200
| |
| |-
| |
| ! style="; text-align: center; width:10%" |Nível
| |
| ! style="; text-align: center; width:10%" |Onde Upar
| |
| ! colspan="6" style="; text-align: center;" |Mobs
| |
| |-
| |
| !180 ~ 200
| |
| !Odin's Past
| |
| | style="vertical-align:bottom; text-align:center" |{{Monster List|id=20604|monstro=<br>Angelgolt}}
| |
| | style="vertical-align:bottom; text-align:center" |{{Monster List|id=20605|monstro=<br>Angelgolt}}
| |
| | style="vertical-align:bottom; text-align:center" |{{Monster List|id=20606|monstro=<br>Holy Frus}}
| |
| | style="vertical-align:bottom; text-align:center" |{{Monster List|id=20607|monstro=<br>Holy Skogul}}
| |
| | style="vertical-align:bottom; text-align:center" |{{Monster List|id=20608|monstro=<br>Arch Plasma}}
| |
| | style="vertical-align:bottom; text-align:center" |{{Monster List|id=20609|monstro=<br>Spectral Plasma}}
| |
| |}
| |
| {| class="wikitablew-tr mw-collapsible mw-collapsed" style="width:80%" ;
| |
| ! colspan="6" style=";" |Nv. 200 à 240
| |
| |-
| |
| ! style="; text-align: center; width:10%" |Nível
| |
| ! style="; text-align: center; width:10%" |Onde Upar
| |
| ! colspan="4" style="; text-align: center;" |Mobs
| |
| |-
| |
| !200 ~ 240
| |
| !Niffdun 01
| |
| | style="vertical-align:bottom; text-align:center" |{{Monster List |id=20938 |monstro=<br> Ghost Cube}}
| |
| | style="vertical-align:bottom; text-align:center" |{{Monster List |id=20939 |monstro=<br> Lude Gal}}
| |
| | style="vertical-align:bottom; text-align:center" |{{Monster List |id=20937 |monstro=<br> Brutal Murderer}}
| |
| | style="vertical-align:bottom; text-align:center" |{{Monster List |id=20935 |monstro=<br> Gan Ceann}}
| |
| |}
| |
| {| class="wikitablew-tr mw-collapsible mw-collapsed" style="width:80%" ;
| |
| ! colspan="7" style=";" |Nv. 240 à 250
| |
| |-
| |
| ! style="; text-align: center; width:10%" |Nível
| |
| ! style="; text-align: center; width:10%" |Onde Upar
| |
| ! colspan="5" style="; text-align: center;" |Mobs
| |
| |-
| |
| ! rowspan="2" |240 ~ 250
| |
| !Clock Tower
| |
| | style="vertical-align:bottom; text-align:center" |{{Monster List|id=20175|monstro=<br>Extra Joker}}
| |
| | style="vertical-align:bottom; text-align:center" |{{Monster List|id=20176|monstro=<br>Erzsebet}}
| |
| | style="vertical-align:bottom; text-align:center" |{{Monster List|id=20177|monstro=<br>Jennifer}}
| |
| | style="vertical-align:bottom; text-align:center" |{{Monster List|id=20178|monstro=<br>General Orc}}
| |
| | style="vertical-align:bottom; text-align:center" |{{Monster List|id=20179|monstro=<br>Sieglouse}}
| |
| |-
| |
| !Constellation Tower
| |
| | colspan="5" style="vertical-align:bottom; text-align:center" |[[Constellation Tower|Constellation]] é uma instância que você pode acessar através do Gerenciador de Instâncias e é a melhor opção se você conseguir aguentar a dificuldade do mapa (pode ser realizada em grupo).
| |
| |}
| |
| {| class="wikitablew-tr mw-collapsible mw-collapsed" style="width:80%" ;
| |
| ! colspan="7" style=";" |Nv. 250 ~ 255
| |
| |-
| |
| ! style="; text-align: center; width:10%" |Nível
| |
| ! style="; text-align: center; width:10%" |Onde Upar
| |
| ! colspan="5" style="; text-align: center;" |Mobs
| |
| |-
| |
| ! rowspan="2" |250
| |
| !Niffdun 02
| |
| | style="vertical-align:bottom; text-align:center" |{{Monster List|id=20941|monstro=<br>GROTE}}
| |
| | style="vertical-align:bottom; text-align:center" |{{Monster List|id=20936|monstro=<br>Disguiser}}
| |
| | style="vertical-align:bottom; text-align:center" |{{Monster List|id=20940|monstro=<br>Blue Moon Loli Ruri}}
| |
| | style="vertical-align:bottom; text-align:center" |{{Monster List|id=20942|monstro=<br>Pierrotzoist}}
| |
| | style="vertical-align:bottom; text-align:center" |{{Monster List|id=20943|monstro=<br>Death Witch}}
| |
| |-
| |
| !amicitia2
| |
| | style="vertical-align:bottom; text-align:center" |{{Monster List|id=20920|monstro=<br>Lavaeter}}
| |
| | style="vertical-align:bottom; text-align:center" |{{Monster List|id=20921|monstro=<br>Fulgor}}
| |
| | style="vertical-align:bottom; text-align:center" |{{Monster List|id=20922|monstro=<br>Napeo}}
| |
| | style="vertical-align:bottom; text-align:center" |{{Monster List|id=20923|monstro=<brGalensis}}
| |
| | style="vertical-align:bottom; text-align:center" |{{Monster List|id=20928|monstro=<br>The One}}
| |
| |}
| |
| </center>
| |
|
| |
|
| ==Evento Caça Turn in== | | ==Evento Caça Turn in== |